The best bowhunters don’t think about their shots at game: they’re automatic from start to finish. But they do think about shooting in the off-season, practicing and polishing the seven basic steps of accurate archery.
The same steps must be mastered whether you shoot recurve bow or compound bow, or whether you aim with or without bowsights.
If you aren’t able to hit a 3-inch bull’s-eye almost every time from 20 yards and a 6-inch spot almost every time from 40 yards, there’s definite room for shooting improvement.
The very best bow shots with sights do even better. They can hit a 2-inch spot at 20 yards, a 4-inch spot at 40 yards, and a 6-inch spot at 60 yards. When you arrive at this level of accuracy with broadhead-tipped elk arrows, you have reached the pinnacle of archery ability. I know several dozen bowhunters who achieve such “archer’s minute of angle accuracy,” so it is not a fluke. But it does require complete mastery of solid bow-shooting steps.
Here are those steps. If you practice hard, you will almost certainly improve your elk-bagging ability.
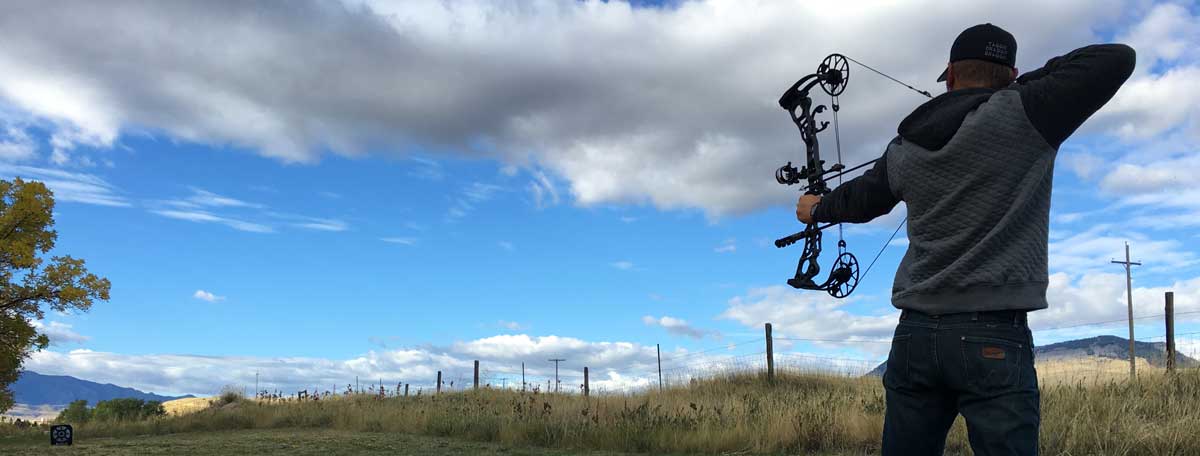
Step #1: Stance
The correct way to stand is not the way most self-taught archers do it.
You should face the target about 45-degrees, with feet parallel and spread 18 to 24 inches apart. Toes should be pointing well toward the target, not at 90 degrees like many beginners stand.
The so-called “open stance” described here does two things. First, it lets you face elk more directly as you shoot. This requires less game-spooking movement to get set for the shot. Second, angling toward the target at 45 degrees moves the bowstring away from your bow arm and chest. If the string even slightly brushes your clothing during the shot, the arrow will veer to one side. This is especially apt to happen in actual hunting situations when you are wearing baggy clothing for warmth.
Most bowhunters shoot compound bows with draw lengths one or two inches too long. With a proper open stance, you will probably need to adjust your compound bow for a shorter, more comfortable draw.
Step #2: Bow Grip
Grip your bow with a relaxed, closed hand. A tight, white-knuckle grip will tense your entire bow arm and severely degrade accuracy. Most top bow shots lightly touch their thumb to forefinger or middle finger in front of the grip.
If you cannot seem to master a loose grip, try an open bow hand with a wrist sling. The sling ties the bow to your hand so it cannot fall out during the shot.
Wrist slings can be cumbersome in quick shooting situations on elk at ground level, but good accuracy is most important of all. In a stand, where you can usually see your quarry approaching, a sling is easier to slip over your wrist before the shot.
Never—I repeat never—shoot with an open hand and no wrist sling. This forces you to grab the bow during the shot—the worst possible thing for accuracy. Bow grabbing is the number one mistake beginning archers make.
Step #3: Draw
Extend your bow arm toward the target with the string gripped in your fingers or the jaws of a mechanical release aid. The most common finger grip on the string is index finger above the arrow nock and next two fingers below the arrow nock.
Point the bow at the target, double-check that your bow grip is loose, and pull the string back smoothly to your face. Do not dip the bow or point it in the air as you draw. Do not push the bow ahead as you draw the string back. Extend the bow fully, and then pull the string straight back.
If your bow has too much poundage to draw smoothly back, you will be forced to dip or raise the bow. This means you should reduce draw weight until your shooting muscles are stronger.
Shooting a bow too heavy for your muscles is the kiss of death on accuracy. You’ll spray arrows all over the target and develop bad shooting habits.
Step #4: Anchor
Once the bowstring is drawn, lock your string hand against the side of your face. This is called the “anchor.” Right-hand shooters anchor to the right side of the face with the right eye behind the bowstring.
Find a comfortable anchor point that more or less aligns your aiming eye with the string. The most common anchor for finger shooters is pressing the index finger in the corner of the mouth or slightly below, with the thumb dropped beneath the chin. Release-aid shooters usually press their release alongside or under the chin.
A bowstring peep with a large aperture hole—at least 3/16-inch—will ensure a consistent anchor point as you shoot. Your anchor is like the back sight on a rifle, allowing consistent aiming from shot to shot. It also transfers a percentage of draw weight from arm to neck muscles for a steadier aim.
Step #5: Aim
Most bowhunters aim with bowsights. A few do not. Bowsights are more accurate in average hands, especially when used with a laser rangefinder.
Bring your aiming sight pin on target, or aim by feel if you do not use a sight. Most archers raise their bow toward the target, and this has merit because it’s easier to see an elk or bull’s-eye above your sights. A few hunters drop the bow down on target, or swing in from right or left.
The key here is consistency. Train yourself to swing on target the same way every time. Move the bow smoothly, hold solidly on target for a second or two, and release the arrow.
Step #6: Release
The way you release can make or break the shot. The string release must be smooth, without a jerk or flinch. This is easier said than done.
Finger shooters have a more difficult job. It is tough to relax three drawing fingers the same from shot to shot, and tough to keep from “plucking” the string as you release. Most top finger shooters draw with three fingers and then relax the top or bottom finger as they aim. This results in a two-finger release, and two fingers are always easier to release with than three.
Simply relax all your fingers after you aim. The bowstring will do the rest, ripping away with the arrow.
It’s easier to release with a tab on your fingers instead of a glove, because a glove develops grooves and hangs up a smooth release. Using a tab might feel strange at first, but quickly becomes second nature.
Mechanical release aids are easier. Simply draw, anchor, aim, and then squeeze the release trigger or button. The key here is squeezing—not punching—the release. If you slap the trigger or button, your whole body will move and the arrow will not fly true.
Step #7: Follow-Through
The final step to bow-shooting accuracy is follow-through. This is the most overlooked yet most important step of all.
After you release, keep aiming until the arrow actually hits the target. Hold your bow up and try to keep the sight picture the same. Your string hand will slide backward along your face and the bow will recoil to one side. But if you try to continue the aim, your accuracy will be superior.
If you follow through every shot on targets, you’ll do it unconsciously on elk. This is the goal of careful step-by-step practice. When a nice bull appears in front of your bow, it’s too late to think about shooting form. You want your shot to be automatic from start to finish—a swift, unconscious and deadly move! Have Other Tips? Put ’em in the comments below.
Elk NetworkSix Steps To Improve Bow Accuracy
Hunting | June 15, 2018
Latest Content
Coming Full Circle in the Show Me State
Passion and perseverance go a long way. Just ask Rocky Mountain Elk Foundation volunteers from the state of Missouri. They know it because they live [...]
Answer the Call – Honoring Volunteers
Below is a reprint from the July-August 2024 issue of Bugle magazine. Merriam-Webster defines ‘volunteer’ as a person who willingly undertakes or expresses an enthusiasm [...]
Texas Volunteers Help Ensure the Future of Hunting
Texas Volunteers Help Ensure the Future of Hunting Texans are known for their bold spirit. That enthusiasm carries over for Rocky Mountain Elk Foundation volunteers [...]