With nothing more than stout plywood and stryofoam, you can build a bombproof cooler that will keep your elk in the deep freeze from Colorado to Connecticut.
Every fall, thousands of hunters power-drive across the country for the chance to chase elk. Killing one and packing the cape and meat out is often a monumental task, but keeping it cool until you reach your freezer is an artform unto itself.
 RMEF member Bernie Kennett of Sherrill, New York, has spent many hours behind the wheel to hunt elk and moose, and recently sent us his instructions for a homemade cooler that has served his family for 22 years running, keeping motherlodes of meat cold for the long haul using materials you can buy at any hardware store.
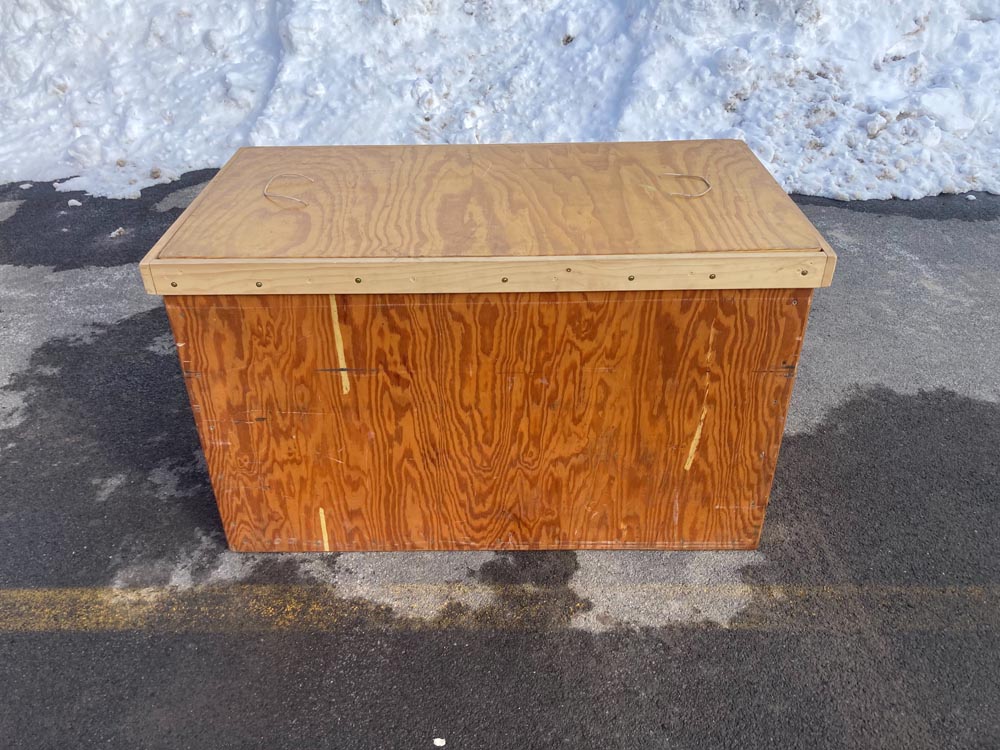
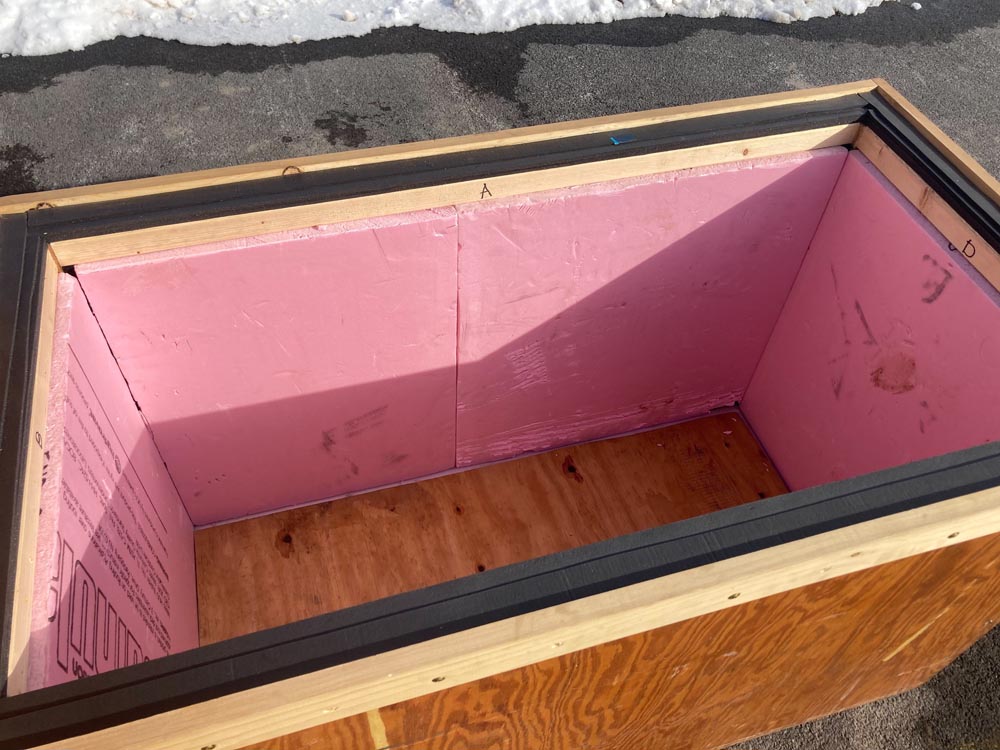
Long before the era of the monster coolers you now find in sporting goods stores, I built one out of 1⁄2-inch exterior plywood that is 48” long x 34” tall x 24” wide. At those dimensions it fits between the wheel wells of a full-sized pickup with room to access it even with a topper. All sides, top and bottom are lined with two inches of styrofoam insulation. I also placed a 1/2-inch piece of plywood on the inside bottom of the cooler to support the styrofoam. It holds a boned-out elk or moose nicely.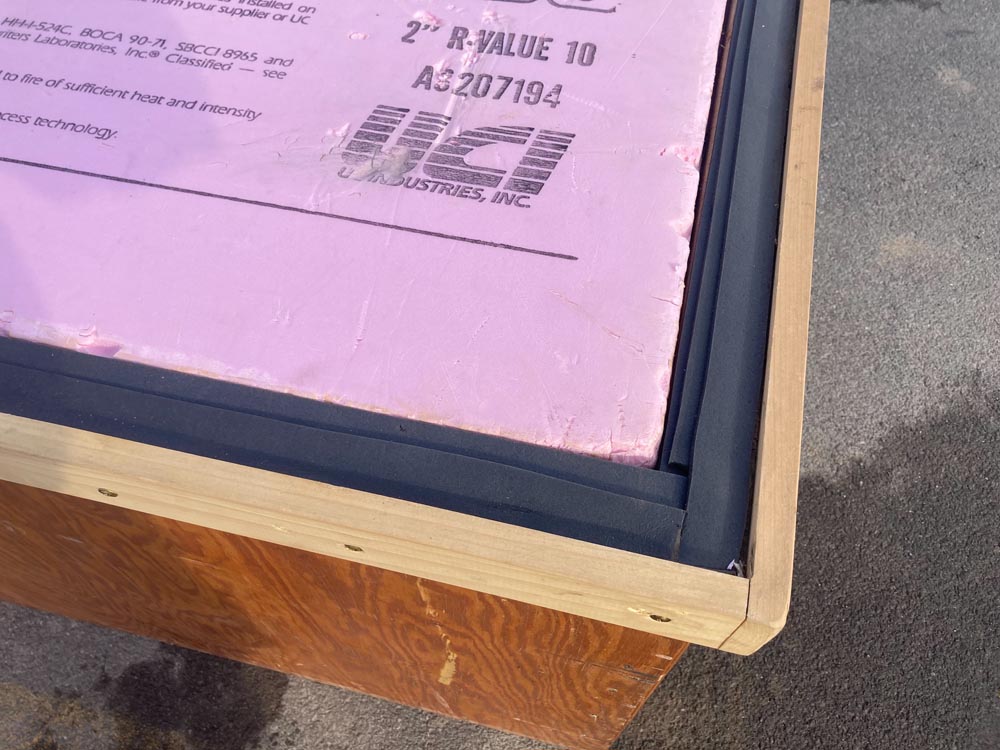
As soon as you break down your elk, buy dry ice. I use about 60 to 75 pounds to start the process. Layer about four inches of meat on the bottom of the cooler, then set two blocks of dry ice (20 pounds) on top of that. Wrap the dry ice in newspaper, towels or old sheets to keep your meat safe from freezer burn. Then continue layering on meat and ice. My preferred top layer is the cape in a cloth game bag or something breathable. I set the last layer of dry ice on top of that, again about 20 pounds.

The remaining space I fill with any insulation I have—clean hunting clothes, sleeping bags, etc. Just before I secure the lid, I put a wireless indoor/outdoor thermometer sensor in the cooler and run the monitor to the cab of my truck. My thermometer bottoms out at -40 F, which is about how cold it will often get in there.
This method has worked for me many times. Using the instructions above, my dry ice lasts at least 48 hours before having to add more, and typically my meat and cape are frozen solid by the time I arrive home!
Important Tips
- NEVER EVER use dry ice in an enclosed area shared by humans or pets. Carbon dioxide gas will kill you.
- Know in advance where you’re going to buy dry ice. Many stores including Costco often carry it, and welding-supply stores are always a good bet. However, keep in mind welding supply houses may not be open Saturday or Sunday. I keep frozen gallon milk jugs in smaller coolers with groceries, then immediately deploy them to start cooling elk prior to deboning.
- Use thick leather gloves to handle dry ice (and your elk meat when you arrive home). Dry ice or -40 degree meat will burn your skin.
- Don’t open the cooler to check the meat or you’ll lose precious cold. Trust your thermometer. But your hand makes an easy backup. If the exterior of the cooler is cold to the touch, you’re in business.
- Monitor the temperature in the cooler, outdoors and your time-to-destination to help decide if you need to purchase more dry ice.
- If you pay to have your meat professionally cut, consider paying a little extra to have it frozen before you place it in the cooler. Several times we have not even had to purchase dry ice as the ambient outdoor temps were below freezing and our meat was already flash-frozen by the processor.
- Whatever you do, plan ahead and don’t lose that precious meat!